> For the complete documentation index, see [llms.txt](https://docs.aporia.com/llms.txt). Markdown versions of documentation pages are available by appending `.md` to page URLs; this page is available as [Markdown](https://docs.aporia.com/v1/data-sources/s3.md).
# Amazon S3
This guide describes how to connect Aporia to an S3 data source in order to monitor a new ML Model in production.
We will assume that your model inputs, outputs and optionally delayed actuals are stored in a file in S3. Currently, the following file formats are supported:
* `parquet`
* `json`
* `csv`
* `delta`
This data source may also be used to connect to your model's training/test set to be used as a baseline for model monitoring.
### Create a IAM role for S3 access
In order to provide access to S3, create a IAM role with the necessary API permissions.
#### Step 1: Create Role
1. Log into your AWS Console and go to the **IAM** console.
2. Click the **Roles** tab in the sidebar.
3. Click **Create role**.
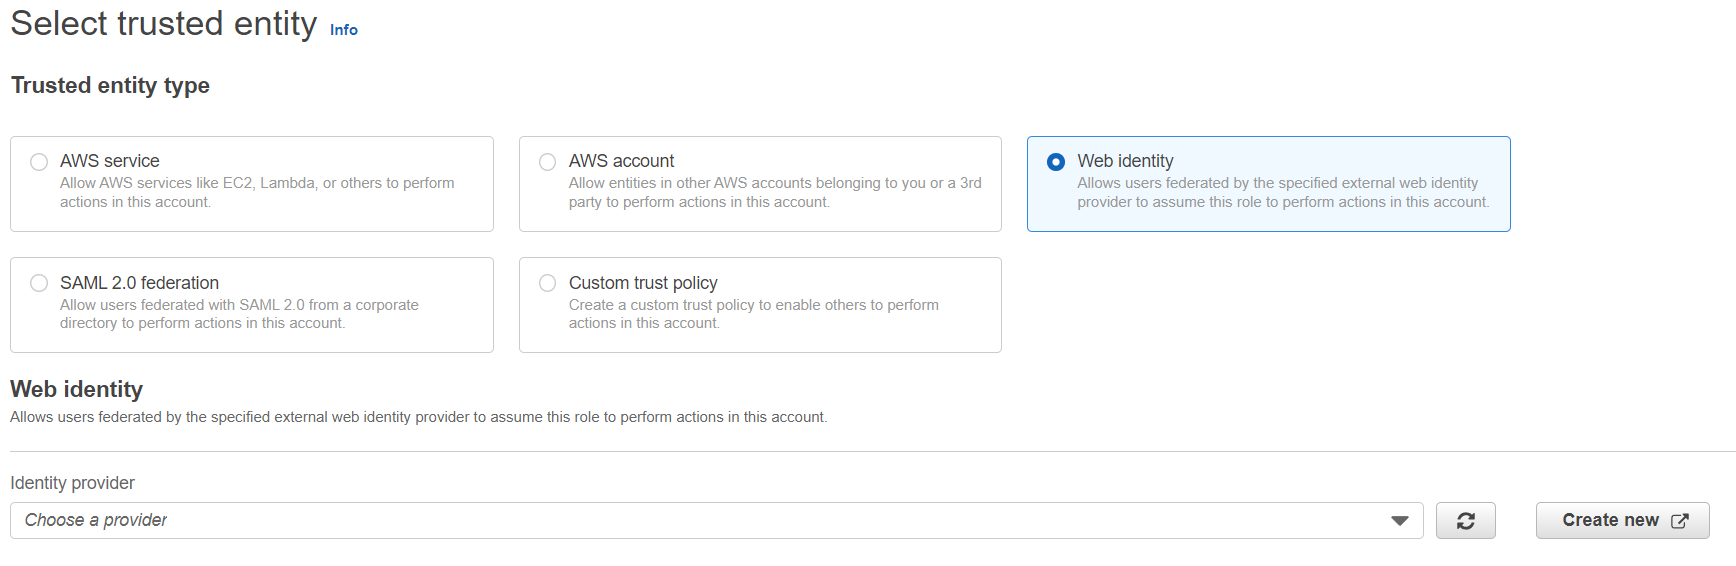
4. In **Select type of trusted entity**, click the **Web Identity** tile.
5. Under **Identity Provider**, click on **Create New**.
6. Under **Provider Type**, click the **OpenID Connect** tile.
7. In the **Provider URL** field, enter the Aporia cluster OIDC URL.
8. In the Audience field, enter "sts.amazonaws.com".
9. Click the **Add provider** button.
10. Close the new tab
11. Refresh the **Identity Provider** list.
12. Select the newly created identity provider.
13. In the **Audience** field, select “sts.amazonaws.com”.
14. Click the **Next** button.
15. Click the **Next** button.
16. In the **Role name** field, enter a role name.
#### Step 2: Create an access policy
1. In the list of roles, click the role you created.
2. Add an inline policy.
3. On the Permissions tab, click **Add permissions** then click **Create inline policy**.\
4. In the policy editor, click the **JSON** tab.
5. Copy the following access policy, and make sure to fill your correct bucket name.
```json
{
"Version": "2012-10-17",
"Statement": [
{
"Effect": "Allow",
"Action": [
"s3:Get*",
"s3:List*"
],
"Resource": [
"arn:aws:s3:::",
"arn:aws:s3:::/*"
]
}
]
}
```
6. Click **Review Policy**.
7. In the **Name** field, enter a policy name.
8. Click **Create policy**.
9. If you use Service Control Policies to deny certain actions at the AWS account level, ensure that `sts:AssumeRoleWithWebIdentity` is allowlisted so Aporia can assume the cross-account role.
10. In the role summary, copy the **Role ARN**.
Next, please provide your Aporia account manager with the Role ARN for the role you've just created.
### Creating an S3 data source in Aporia
To create a new model to be monitored in Aporia, you can call the `aporia.create_model(...)` API:
```python
aporia.create_model("", "")
```
Each model in Aporia contains different **Model Versions**. When you (re)train your model, you should create a new model version in Aporia.
```python
apr_model = aporia.create_model_version(
model_id="",
model_version="v1",
model_type="binary"
raw_inputs={
"raw_text": "text",
},
features={
"amount": "numeric",
"owner": "string",
"is_new": "boolean",
"embeddings": {"type": "tensor", "dimensions": [768]},
},
predictions={
"will_buy_insurance": "boolean",
"proba": "numeric",
},
)
```
Each raw input, feature or prediction is mapped by default to the column of the same name in the Athena query.
By creating a feature named `amount` or a prediction named `proba`, for example, the S3 data source will expect a column in the file named `amount` or `proba`, respectively.
Next, create an instance of `S3DataSource` and pass it to `apr_model.connect_serving(...)` or `apr_model.connect_training(...)`:
```python
data_source = S3DataSource(
object_path="s3://my-bucket/my-file.parquet"
object_format="parquet", # other options: csv, json, delta
# Optional - use the select_expr param to apply additional Spark SQL
select_expr=["", ...],
# Optional - use the read_options param to apply any Spark configuration
# (e.g custom Spark resources necessary for this model)
read_options={...}
)
apr_model.connect_serving(
data_source=data_source,
# Names of the prediction ID and prediction timestamp columns
id_column="prediction_id",
timestamp_column="prediction_timestamp",
)
```
Note that as part of the `connect_serving` API, you are required to specify additional 2 columns:
* `id_column` - A unique ID to represent this prediction.
* `timestamp_column` - A column representing when did this prediction occur.
### What's Next
For more information on:
* Advanced feature / prediction <-> column mapping
* How to integrate delayed actuals
* How to integrate training / test sets
Please see the [Data Sources Overview](/v1/data-sources/overview.md) page.